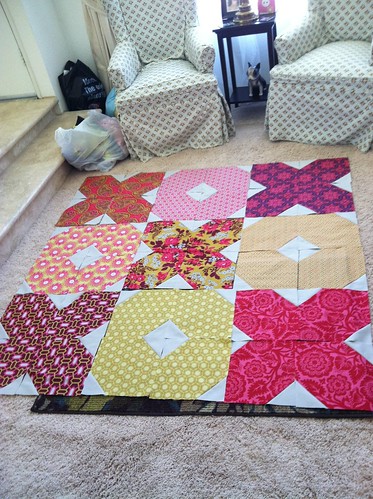
I read many blogs. In fact, I am fairly certain I'm addicted to them. I find such inspiration from them. I love reading tutorials and seeing how these creative dynamos take a simple, age old quilt block and use it in a new and different way. It was while reading one of the "recipes" found on www.modabakeshop.com that I was inspired to create the above quilt top. The block is called "the road to Tennessee". There are a number of ways to arrange them. Each yielding quite a different look. The recipe actually calls for a combination of 5 1/2 and 2 1/2" squares. I used a combination of 10 1/2 and 4" squares. The finished top will measure 60 X 60" and I will call it "Hugs and Kisses". It was made to be used as a preschool nap quilt and with my baby girl in mind. She has already claimed it. Being drawn, as I knew she would be, to the bold prints and bright colors.
Hope your day was creative too,
Rob
Monday, August 22, 2011
What I did today.
Thursday, August 18, 2011
Back on track....
I just realized that I haven't posted since June 8th. I can't believe how quickly this summer has slipped by. I know that the rest of the world around me doesn't return to school until August 30th. But, here where I live, school went back on the 10th. My son started kindergarten this year, so this school year is special in my house. Although our summer was filled with visiting family and several airplane rides, I am happy to return to a little structure. With Jackson in school, I am looking forward to spending a little one on one time with my baby girl. She will only be going 3 days, so I am hoping to foster her creative interests on her off days. I am toying with the idea of getting her a small sewing machine. Any suggestions on brand or models?
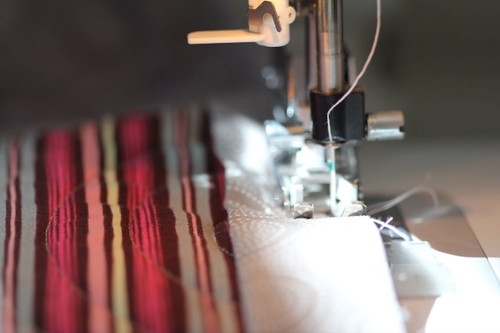
This summer was actually very productive for me project wise. For the first time since my babies came home, I have managed to complete several quilts. I feel like I am finally "back on track" . The photo above was actually taken this afternoon. I am completing the binding on a quilt that will accompany my niece to college next week. I will post a photo of the whole quilt once I'm done. My friend Sue Salinger did the actual quilting. I absolutely love it!
More soon,
Rob
Wednesday, June 8, 2011
Sew Liberated
Just got home to find a box from Amazon. Can I tell you how much I LOVE, LOVE, LOVE one-click on Amazon.com??? I will be reading a blog, see a book I have to have and then, voilà! One-click and it's there waiting on my doorstep no more than two days later. I just love that.
At any rate, I was looking at one of my fav blogs, www.quiltdad.com and saw where he had joined in on the year long Farmers wife sampler quilt along. I love the idea of traditional blocks done in modern fabrics. Something about connecting what I love now with the original blocks of quilting ancestors just makes me happy. Also, I have come to find that each time I push myself to try something I think is going to be hard, I learn some new skill that before I would have said I couldn't do. So, in an effort to further my aptitude, I ordered to book and have decided to jump in.
While shopping for the book on Amazon, the nice Amazon people of course put forth a few "recommendations" just for me :) Well, who could resist such thoughtfulness? Certainly not me. Therefore, I feel like this properly explains why 4 books arrived alongside my originally intended purchase. At least, this is what I told my hubby last night when questioned!
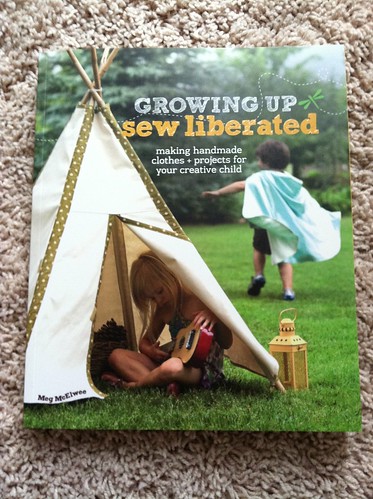
Behold, the newest book by Meg McElwee of sewliberated.com I have her first book and found it inspiring. I like flipping through it for ideas. But this newest one is going to be used to death, I can tell. Meg is a former Montessori teacher and uses her background in the development of this book, I am sure. She is also a mother of toddlers and that resonates with me at the moment. I can see more than a couple of projects in this book that I will be attempting in the near future. As a matter of fact, I am off to shower so I can head out and find bamboo sticks. I really want one of these tents standing in the middle of the living room, ready for adventure, when my littles arrive home.
Happy sewing,
Rob
Tuesday, May 24, 2011
Friends, Fabric and Food. What more can you ask for?
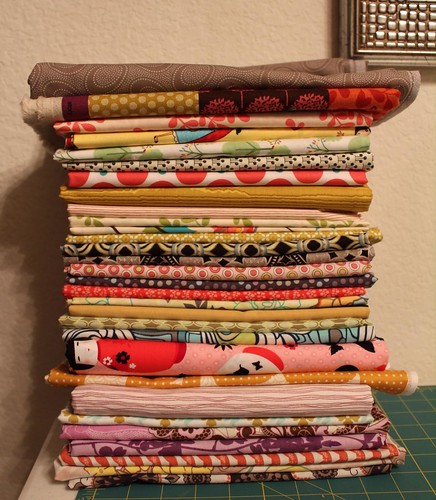
I was fortunate enough to spend the day with some of my peeps from the Wednesday Wackos. We hit 2 different shops. The Sewing Party in Laguna Hills, CA. and Sacred Moondance in Lake Forest, CA. I didnt know until this morning, but Sacred Moondance was having a going out of business sale. The entire store was 65% off!!!! Pictured here is a total of 33 yards of fabric. Not shown are 5 patterns and some purse hardware that I also purchased. I can not tell you how happy I am with my haul. I dont have plans for the majority of the fabric, but I like that I've added some out of the box stuff for me, to my stash. I was recently moved to start a basic bow tie quilt after seeing one posted on one of the blogs I follow. Its such a classic, simple block and yet in contemporary fabrics - it just looked so fun and inviting. I already have the majority of the fabric cut out. I will post some pictures of my progress in the next few days.
Happy Tuesday,
Rob
Sunday, April 24, 2011
Happy Easter!

There were so many eggs to hide this year that the yard was literally carpeted. You know you've hidden too many eggs when you have to actually persuade the kids to keep hunting! It was great fun though. The kids consumed more sugar than they should have and my house is covered in Easter grass. I feel like it was a success.
Well, I am off to try to get them to sleep. I have a quilt I am trying to finish. I am hoping to get the binding started tonight. I will post some pics when I finish.
Goodnight,
Rob
Saturday, March 26, 2011
Jelly Roll Race Quilt
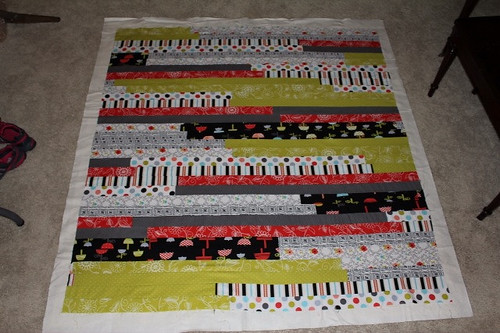
This makes the 3rd one of these quilt tops that I have made. My friend Robin posted about the jelly roll races that she saw on YouTube. She suggested that our friendship group try it out. Well, needless to say, I am more than a little hooked. A jelly roll is made up of forty 21/2" wide X roughly 44" long strips of a coordinated line of fabrics. I think you see them most commonly from Moda, but many others have joined the trend, which makes them easy to find. However, my friend Pam created her first one by using 5 strips each of nine different fabrics that she cut from her stash. I was the lucky recipient of this one! I am putting it together to use as a nap quilt for the babies at school. When using 45 strips, as opposed to 40, I find the finished size to be 60X63, which I really like. That is also the way I put the one pictured above together. I found my fabrics at Fresh Picked Fabrics in Brea. I really do like that shop. So bright and colorful. Plus, they come up with so many finished projects that I find it inspirational just walking around.
So, I am ready to begin pin basting. I decided to write this little blog post first, for a couple of reasons. The first being that I hate pin basting and am no hurry to get down on my hands and knees. Secondly, I know that it's been a while since my last post. This is because my father had a stroke and my grandma died, all in the same week. Thankfully, my dad's stroke was mild. He doesn't recall any of it and seems perfectly fine now. My Grandma was 89 and had come down with pneumonia again. Her wish was to be at home, surrounded by her loved ones when her time came. That is exactly what happened. I was sad to lose her as she really was a very nice grandma. But, I know that her heart was right and that she is in a better place. She passed with all of her children and all of her 39 grandchildren surrounding her bedside. I just don't think one can ask for a better way to go.
We'll travel to New Mexico later in the week to lay her next to my grandfather in the small town she grew up in.
Till next time,
Rob
Tuesday, February 15, 2011
Dresden Plate
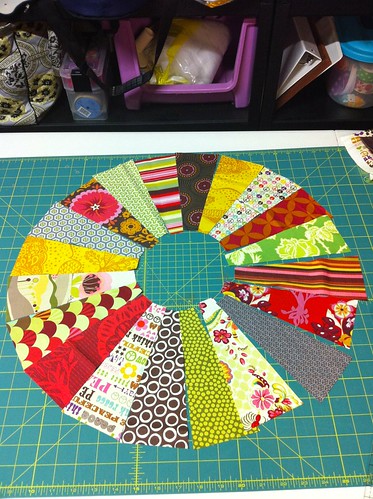
Behold my new project! I purchased a Dresden ruler a while back. I was going to use it to make some mug rugs. However, as usual, other projects crowded in and the ruler was laid to the side, unopened. But today, as I was perusing my many blogs, I came across a tutorial for a Dresden plate pattern. I never knew they were so simple! At least, the tutorial certainly made it seem that way. So, remembering my new ruler, I dug out some scraps and started cutting. This is what I have so far. I have yet to decide what to do with it. Do I make a large pillow? Or, do I make 3 more and patchwork piece a lap quilt? I think I'll put the first one together and see how it goes.
Post more tomorrow,
Rob
Monday, February 14, 2011
Happy Valentines Day 2011

I wanted to share my Valentine Day babies with you all. I am sure that years from now the babies will hate me for posting this picture of them that will forever live on the Internet, but I just can't help myself. They have gotten so used to me and my camera that they barely acknowledge me when I follow them around with it. I asked them to kiss and was just lucky that they complied. I know it looks like they are just so nice to each other. I would like to take credit for being an amazing parent at this point. However....in the interest of full disclosure, it should be said that Jack pushed her off the chair directly following this photo. Those of you who have boys will understand. They can't help themselves :)
We had a great night at home, just my husband, the babies and myself. We all exchanged cards and the babies actually signed and decorated their own. We then had bacon, eggs, and chocolate chip pancakes for dinner. It just doesn't get any better than that.
See you soon,
Rob
Thursday, January 27, 2011
One "road" lead to another.......


Friday, January 21, 2011
I am getting a "Big Kick" out of my new toy.....

So, I was surfing Youtube a while ago for fabric flower tutorials. (What??!! You know you do it too!! ) At any rate, I was surfing away when I came across the stamp shack lady. You can read her blog here http://www.stampshacklady.blogspot.com/

Wednesday, January 19, 2011
There's a first time for everything!


Wednesday, January 12, 2011
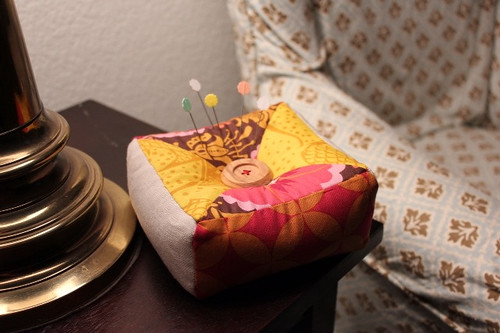
Give Peace a Chance!
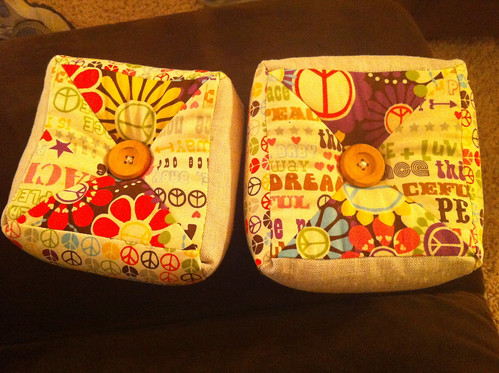
Today was quite productive. I not only completed these 2 pincushions, but I was able to work on 2 additional pillows. One of the pillows is a sew along with www.stitchedincolor.com This is a great blog I found recently. She is making a 20x20 quilted Valentines day Pillow with some embroided detail. So far, it's looking pretty cute. I am hoping she posts the second part soon. If you are so inclined, pop over and take a look. She posted the first part just a few days ago. If you wanted to join in, you would definitely be able to catch up.
What did you all sew today?
Sunday, January 9, 2011
A new pincushion
Completed! A new pincushion filled with crushed walnut shells. I have a few pincushions filled with shells, but I bought them from various shows. I have never actually made one before. I know you can buy a little bag of crushed shells for about 5 bucks at a show. However, this is usually only enough to fill one pincushion. My friend Robin told me you could buy a alb bag of shells at the pet store for about $7, and she was absolutely right. I think they keep it in the reptile supply section. At any rate, I find these types of pincushions much nicer to use than the fiber filled ones. For one thing, I like the way they stay weighted to the table. Makes it easier to pull the pins in and out in my opinion. I used a selection of prints from Anna Marie Horner, along with some natural cotton/linen blend.
I found the tutorial for this pincushion here:
http://www.typepad.com/services/trackback/6a00d8347b268b53ef00e54fd5f0fa8834
Check it out. It's a very cute blog.
This will serve as my completed project for Monday. I will be spending the day baking a pink birthday cake and shopping for Hello Kitty decorations. My baby girl turns 3 tomorrow and a Hello Kitty birthday was requested.
See you later in the week,
Rob
Yes...another bag!


Thursday, January 6, 2011
Up and at 'em today!
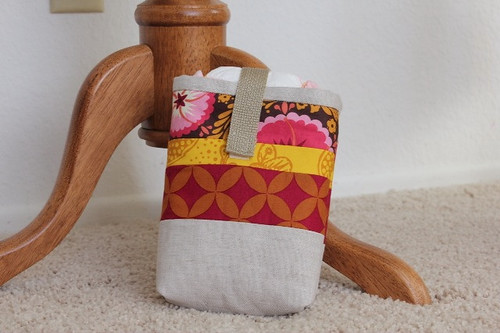
That's right folks, it's only 9:30 AM and I have a completed project to post! In my head, I am imagine your wild applause. I am also imagining me taking a bow. I know, I have too much time on my hands sometimes. At any rate, I was up so early this morning that I decided I might as well be productive. The carpet cleaners arrived at 7:30 AM and the cleaning lady directly there after. The cleaning lady comes every other Thursday ( yes, these are my favorite days and my beloved Teresa is my favorite person!) However, the need for a carpet cleaner is another matter entirely. It's actually his second visit this week. My darling children had an unfortunate incident with 2 Costco sized containers of chocolate powder, an entire gallon of milk and my new BEIGE carpet. *I'm just gonna stop for a moment and let that last sentence sink in for all you moms out there.....*
Yes, it seems to have come out. According to the guy, once he comes back to re-tack and stretch the carpet, it'll be like it never happened. Also yes, my darlings were unharmed in this incident. Barely, but they survived. :)
So, since I had to be up, I took a few minutes to bang out this cute little diaper pouch. I found a tutorial for it at www.noodle-house.com
She has many more tutorials posted. They are all very cute. I will definitely be making a few more of her items.
I am off to shop for some more linen and fusible fleece.
Hope you have a great day,
Rob
Tuesday, January 4, 2011
My new bag
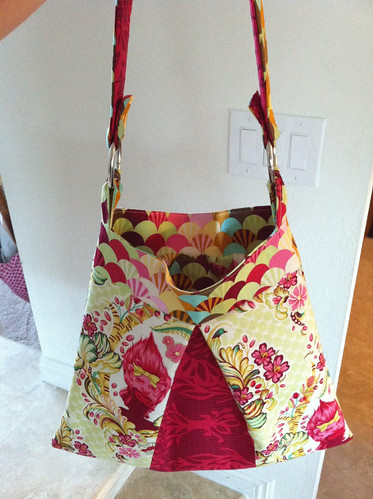
This is my new bag. I am very proud of it. It's an original design that I came up with in a brainstorm last night. I was surfing Etsy and saw an add for a cute purse pattern. I was just about to buy it when it occurred to me that I would probably not make it according to the original instructions. Just looking at the pattern picture, I could tell I was going to make a number of changes. Different strap, shorter, wider...etc. I decided to sketch something out and this is what I ended up with. It's completely different from my original inspiration, but I really enjoyed the whole improvisation of it all. I used my Tula Pink stash. I had been saving it for an apron, but this way I will get far more use out of it. I can't tell you how satisfying it is to have completed 2 projects so far this year. Yes, one was a pin cushion. But, just that small step lead to today's accomplishment. Just imagine what tomorrow could bring!
Monday, January 3, 2011
Pin Cushion
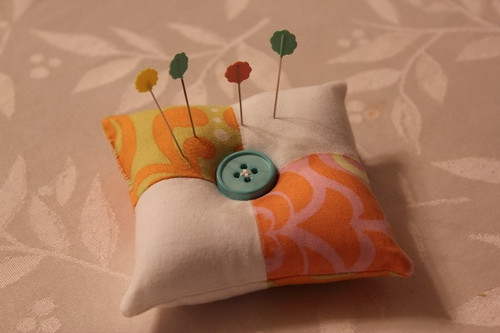
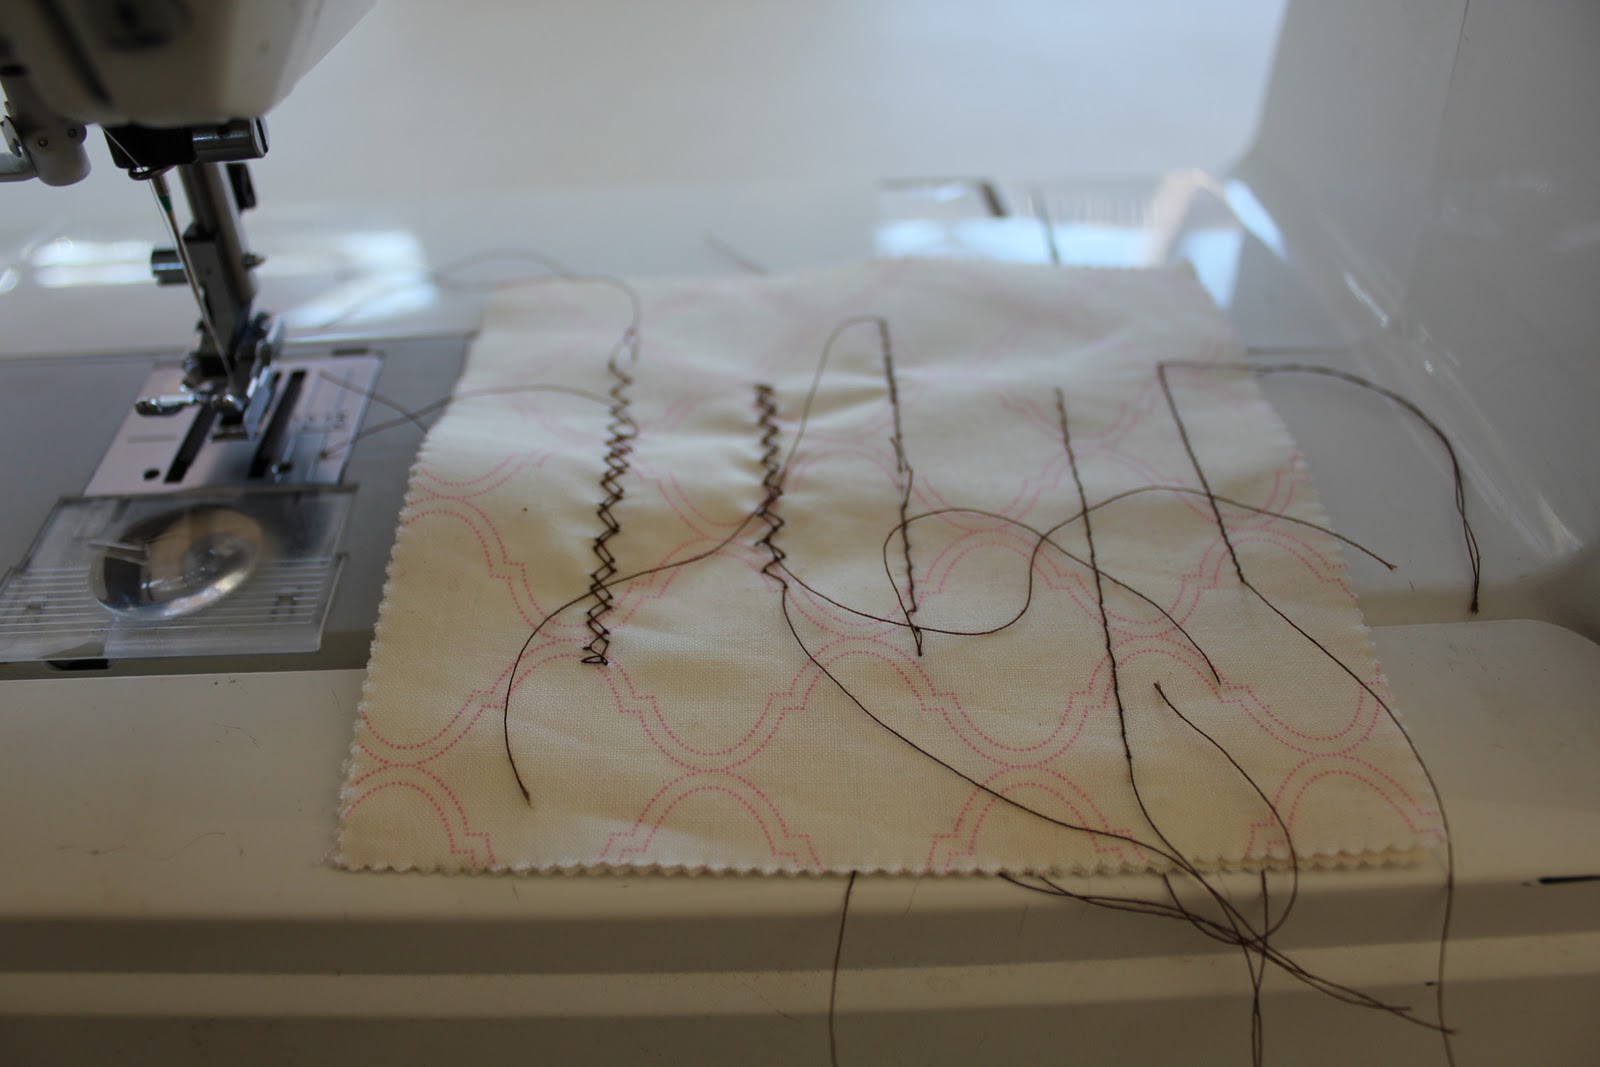
This is what I accomplished today. It's not much, but since it was a rainy day and I was home alone with my 2 turbo babies, I am very proud of being able to sew at all! I came across a tutorial here http://paperstringcloth.blogspot.com/2007/07/pincushion-tutorial.html
It was a simple little project, but the author of this tutorial showed me a new way to sew on the buttons. I always have a hard time with that. The way she explained it made perfect sense. So, voilà! Today a pincushion, tomorrow a quilt ...... Maybe :)