Thursday, January 27, 2011

One "road" lead to another.......

 Above is my first completed fabric flower. I attached it to a pin back and then added it to a cute fabric covered headband. My darling girl actually wore it for a little while! She is vehemently opposed to hair accessories, so this is quite an accomplishment.
Last weekend I was lucky enough to attend the "Road to California" quilt show over in Ontario. What a feast for the quilted eye that show is!!! At any rate, I came across 2" hexagon die cuts from Paper Pieces. I have always been curious about english paper piecing, so I bought 2 small packs of 25 each. Pictured below is my first stack.
I took a road trip to Arizona this past week, so I had some time to kill in the car. I am not a hand quilter by any means, but in the tradition of the new year, I had decided to step out of my box a little. Well, lets just say that I am hooked!!!! I had pieced all 50 die cuts before we hit the AZ border. Next question of course was what on earth was I going to do with them?

 I follow a blog called www.stitchedincolor.com
Rachel had posted about 2 separate pillow contests, so I thought I would give it a try. Nothing ventured, nothing gained - right?


So, after messing with the layout a little, I finally decided on a design. I began whip stitching my little beauties together. May I offer a word of caution if you do decided to give english paper piecing a try? Make sure you are lining up the correct edge, to the correct edge. It's easy to just start bending and stitching and then before you know it, you've got a funky fabric origami thing that you just never intended.
I also came across quite a few accessories for the quilter that were made for my little "Bigkick". I will be logging in to order some more dies to make my cutting time fly by!
Happy quilting,
Rob


Friday, January 21, 2011

I am getting a "Big Kick" out of my new toy.....


So, I was surfing Youtube a while ago for fabric flower tutorials. (What??!! You know you do it too!! ) At any rate, I was surfing away when I came across the stamp shack lady. You can read her blog here http://www.stampshacklady.blogspot.com/
She is actually a Stampin' Up rep. from Texas. Now, I am not a scrapbooker. It's just not a craft that has ever called to me. But this gal was using her scrapbook tools to create perfectly cut fabric flowers! Umm...GENIUS!!! I did not know until then that those fancy little die cutters would also cut through fabric. 6 layers to be exact. They also cut through felt, wool, cork board and metal. I know, who knew?  So, I was intrigued. I am all about a shortcut if it gets me some instant gratification on a project. In the tutorial, she showed these adorable shabby chic little fabric flowers that she made and then attached to headbands. My mind immediately started thinking about all the different ways I could incorporate such a tool into my quilting and sewing. I did a little research, and it would seem that Sizzix is the company that makes the "Big Shot" tool and that its available solely thru Stampin' Up. It retails for $99.99. Now, you could contact your local rep. and have a home party and get credit towards one, or you could simply go online and pay full price. However, I am a bit of a bargain shopper when it comes to buying things that I don't necessarily know that I will use a whole lot.


So, upon further research, it would seem that the Sizzix "Big Kick" is the exact same machine and is readily available at your local Michael's or Joann's. It also retails for $99.99, but you can use a coupon for this one!!! That's right, I got 40% off of my little cutter. I was so proud of my frugality! :) Now, the fabric flower die that I wanted was a Stampin up exclusive, so I had to order that from a rep. But, Joann's had all of the Sizzix items on sale this past week, so I was able to pick up the scalloped circle that I wanted for my next project off of the Moda Bakeshop. That is for another post though.
So, I am off to Michael's for some headbands and pin backs to apply to my little flowers.
Have a great weekend,
Rob

Wednesday, January 19, 2011

There's a first time for everything!

 Behold! These are the first stitches ever stitched by my little sister. I am so proud!!! My sissy requested a sewing machine for Christmas this year. Now, you have to know that no one, save me - sews or quilts in my family. I am the lone crafter. Until now!!!! After an afternoon's tutorial with my sissy, her machine and her owner's manual - I am suddenly no longer flying solo. I envision sew so lates, fabric shopping...oh I just can't wait. Now, don't get me wrong, my sissy is young, hip, and at this point - would not be caught dead "quilting". But, I am optimistic. At some point, I think we all give it a try. I mean, the sewing machine just kind of leads you from one thing to another, don't you think?
Which leads me to my next sewing milestone. I installed an invisible zipper!!!!! That's right, you heard me correctly, an invisble zipper. I think I mentioned in an earlier post about a sew along that I came across on http://www.stitchedincolor.com/
This is a great blog that I have just recently discovered. I find her work very inspirational. Very much the type of quilting that I aspire to most. Her tutorial was very informative, very clearly written with lots of pictures. If you get a chance, please hop over and check her out.

Well, that's it for me today. I am off to start a new project. I need to make a Valentines Day pillow cover for my Nina. I'll post a pic when I get it finished.

See you soon,
Rob

Wednesday, January 12, 2011

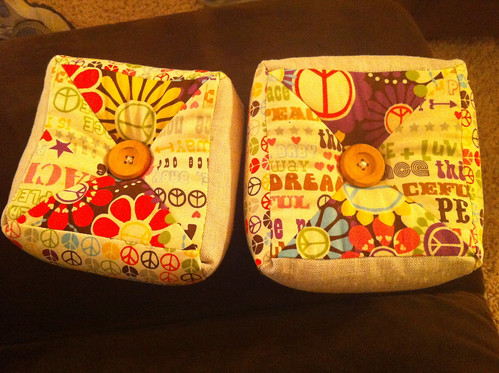
Give Peace a Chance!


Peace Pincushions, originally uploaded by rkkilmer.

Today was quite productive. I not only completed these 2 pincushions, but I was able to work on 2 additional pillows. One of the pillows is a sew along with www.stitchedincolor.com This is a great blog I found recently. She is making a 20x20 quilted Valentines day Pillow with some embroided detail. So far, it's looking pretty cute. I am hoping she posts the second part soon. If you are so inclined, pop over and take a look. She posted the first part just a few days ago. If you wanted to join in, you would definitely be able to catch up.
What did you all sew today?

Sunday, January 9, 2011

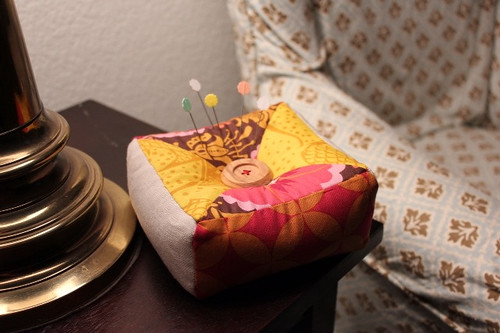
A new pincushion


Pin cushion #2, originally uploaded by rkkilmer.

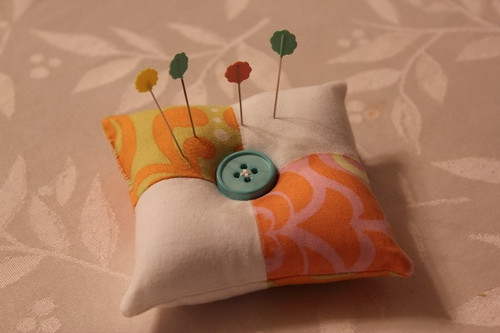
Completed! A new pincushion filled with crushed walnut shells. I have a few pincushions filled with shells, but I bought them from various shows. I have never actually made one before. I know you can buy a little bag of crushed shells for about 5 bucks at a show. However, this is usually only enough to fill one pincushion. My friend Robin told me you could buy a alb bag of shells at the pet store for about $7, and she was absolutely right. I think they keep it in the reptile supply section. At any rate, I find these types of pincushions much nicer to use than the fiber filled ones. For one thing, I like the way they stay weighted to the table. Makes it easier to pull the pins in and out in my opinion. I used a selection of prints from Anna Marie Horner, along with some natural cotton/linen blend.
I found the tutorial for this pincushion here:
http://www.typepad.com/services/trackback/6a00d8347b268b53ef00e54fd5f0fa8834
Check it out. It's a very cute blog.
This will serve as my completed project for Monday. I will be spending the day baking a pink birthday cake and shopping for Hello Kitty decorations. My baby girl turns 3 tomorrow and a Hello Kitty birthday was requested.
See you later in the week,
Rob

Yes...another bag!

I can't seem to help it. I am filled with inspiration for new bags. I have always wanted to make them but always thought they were too hard. Well, not so much hard, as just beyond my current sewing abilities. However, I have become one with fusible interfacing. This has helped immensely.
As you can see, I even attached a magnetic snap. This really does give the bag a more complete look. Not so much "home made" as " hand made". I cant wait to use it tomorrow.


I recently ordered some echino fabric from Etsy. It arrived in the mail yesterday, so tonight I am going to start on an insulated camera bag for my new DSLR. I will be using velcro and high density foam for the first time. Wish me luck!
Rob

Thursday, January 6, 2011

Up and at 'em today!


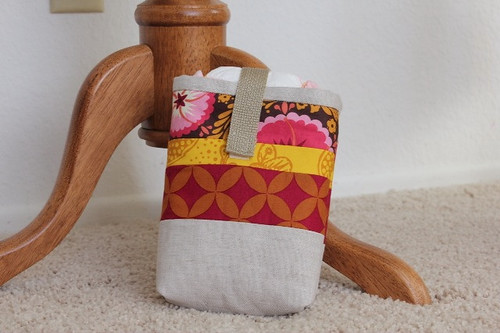
Cute Diaper Pouch, originally uploaded by rkkilmer.

That's right folks, it's only 9:30 AM and I have a completed project to post! In my head, I am imagine your wild applause. I am also imagining me taking a bow. I know, I have too much time on my hands sometimes. At any rate, I was up so early this morning that I decided I might as well be productive. The carpet cleaners arrived at 7:30 AM and the cleaning lady directly there after. The cleaning lady comes every other Thursday ( yes, these are my favorite days and my beloved Teresa is my favorite person!) However, the need for a carpet cleaner is another matter entirely. It's actually his second visit this week. My darling children had an unfortunate incident with 2 Costco sized containers of chocolate powder, an entire gallon of milk and my new BEIGE carpet. *I'm just gonna stop for a moment and let that last sentence sink in for all you moms out there.....*
Yes, it seems to have come out. According to the guy, once he comes back to re-tack and stretch the carpet, it'll be like it never happened. Also yes, my darlings were unharmed in this incident. Barely, but they survived. :)
So, since I had to be up, I took a few minutes to bang out this cute little diaper pouch. I found a tutorial for it at www.noodle-house.com
She has many more tutorials posted. They are all very cute. I will definitely be making a few more of her items.
I am off to shop for some more linen and fusible fleece.
Hope you have a great day,
Rob

Tuesday, January 4, 2011

My new bag


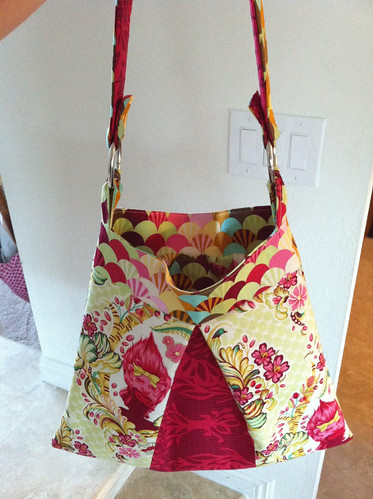
My new bag, originally uploaded by rkkilmer.

This is my new bag. I am very proud of it. It's an original design that I came up with in a brainstorm last night. I was surfing Etsy and saw an add for a cute purse pattern. I was just about to buy it when it occurred to me that I would probably not make it according to the original instructions. Just looking at the pattern picture, I could tell I was going to make a number of changes. Different strap, shorter, wider...etc. I decided to sketch something out and this is what I ended up with. It's completely different from my original inspiration, but I really enjoyed the whole improvisation of it all. I used my Tula Pink stash. I had been saving it for an apron, but this way I will get far more use out of it. I can't tell you how satisfying it is to have completed 2 projects so far this year. Yes, one was a pin cushion. But, just that small step lead to today's accomplishment. Just imagine what tomorrow could bring!

Monday, January 3, 2011

Pin Cushion


Pin Cushion, originally uploaded by rkkilmer.

This is what I accomplished today. It's not much, but since it was a rainy day and I was home alone with my 2 turbo babies, I am very proud of being able to sew at all! I came across a tutorial here http://paperstringcloth.blogspot.com/2007/07/pincushion-tutorial.html
It was a simple little project, but the author of this tutorial showed me a new way to sew on the buttons. I always have a hard time with that. The way she explained it made perfect sense. So, voilĂ ! Today a pincushion, tomorrow a quilt ...... Maybe :)